
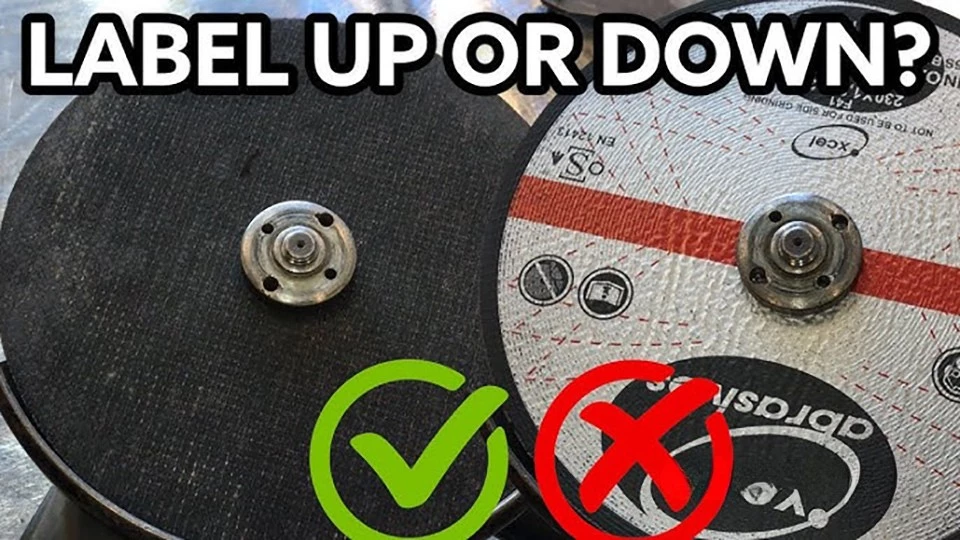
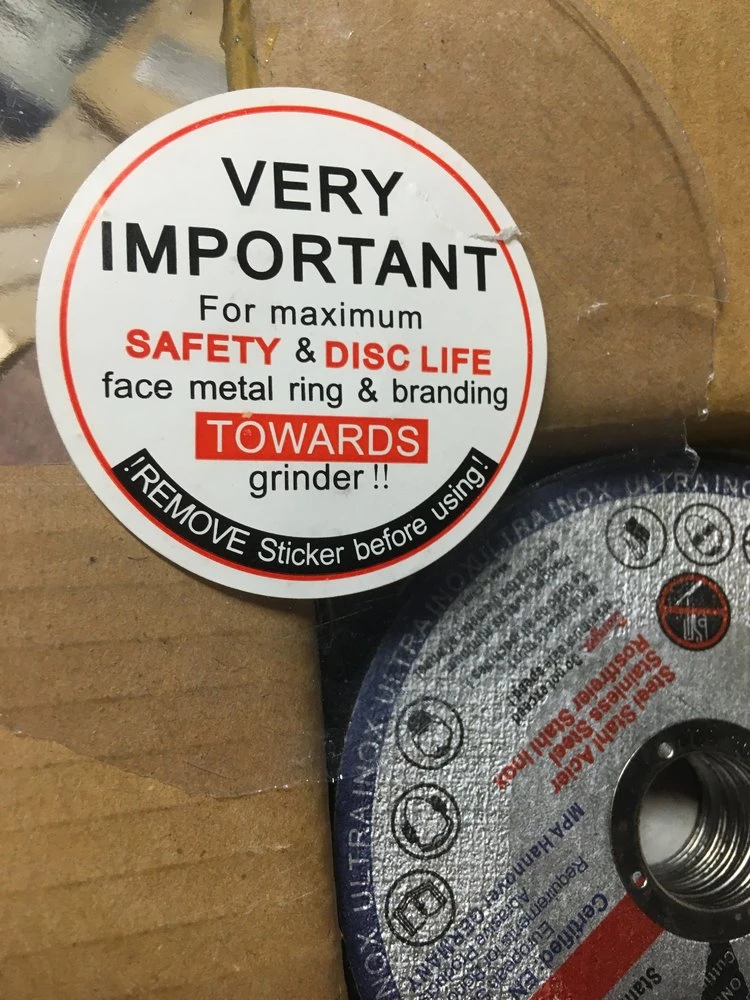
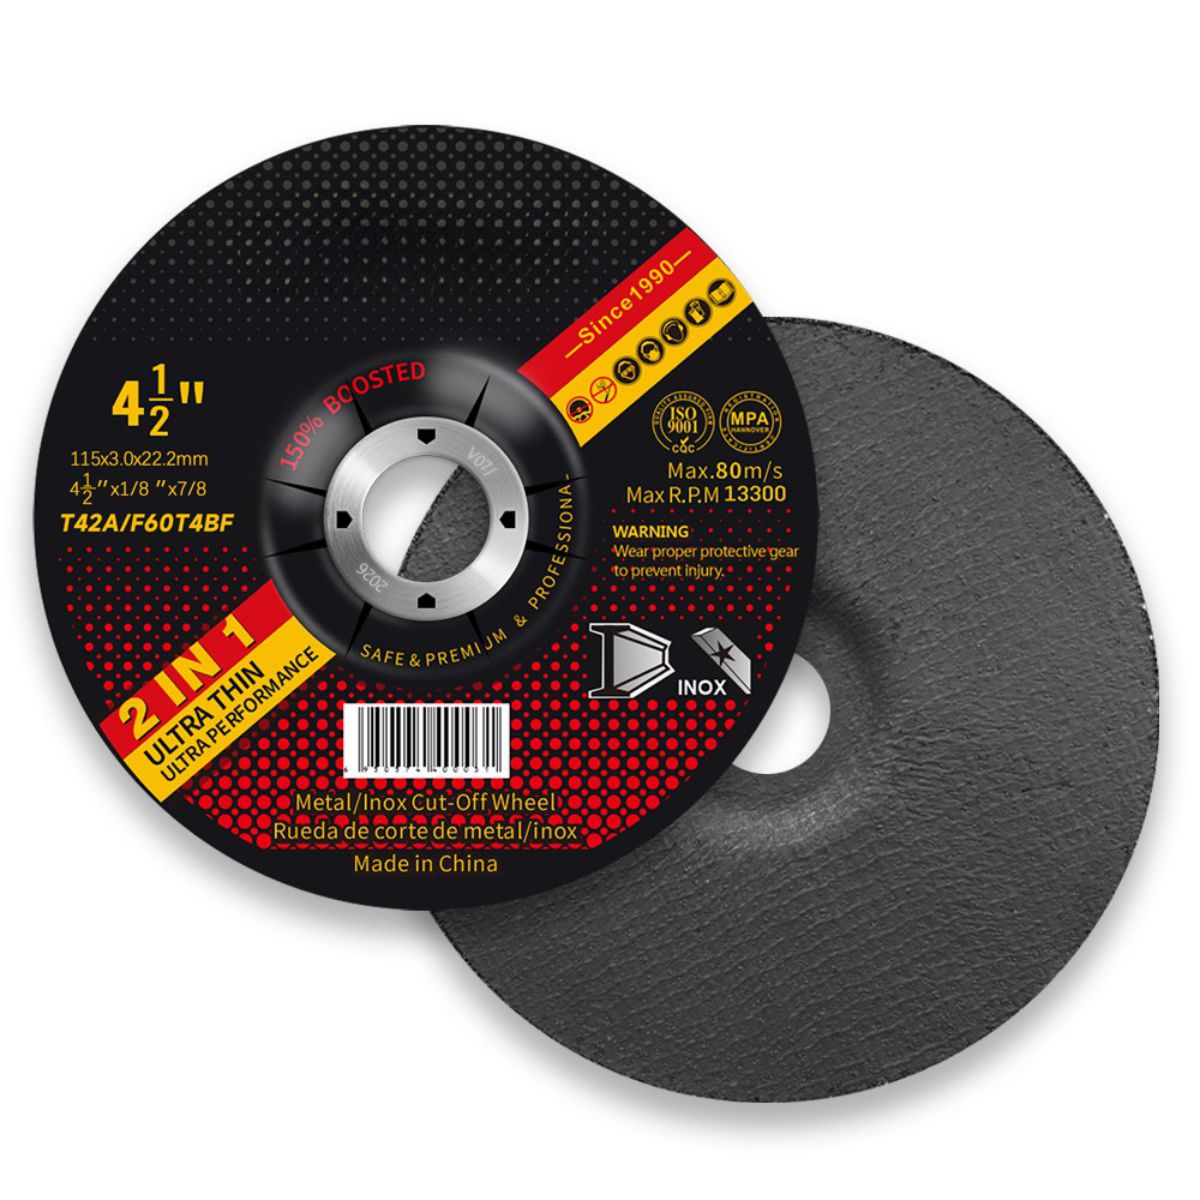
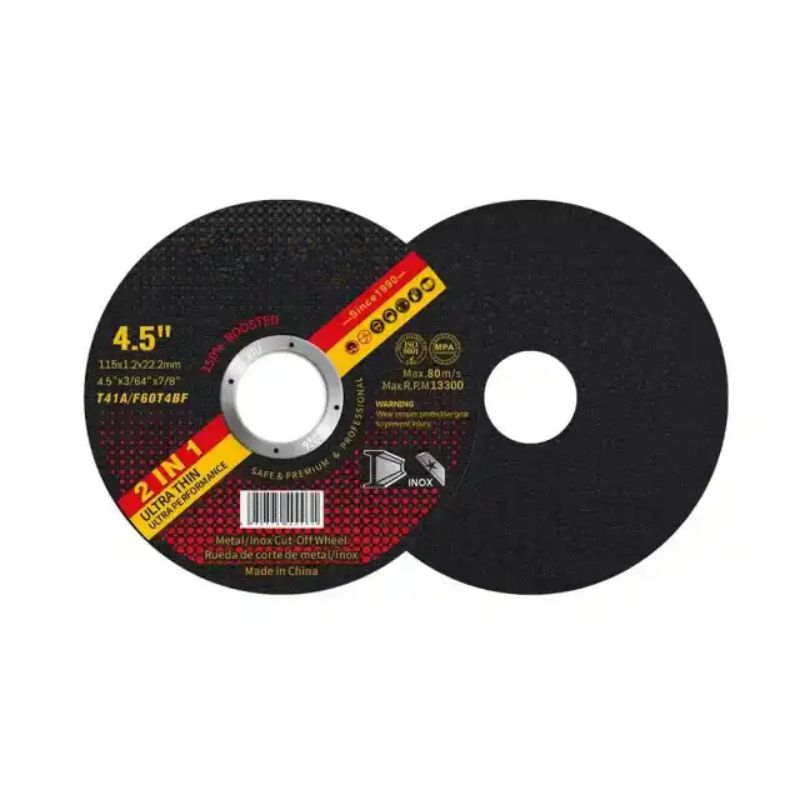
The cutting disc installs with the label side facing outward and the metal ring or hub side facing inward toward the grinder. This setup aligns with the disc’s design for stability and safety, and always match any directional arrow on the disc to the grinder’s rotation—typically clockwise when viewed from the handle.
I know that getting this right prevents disc failure and injuries in a busy workshop. In this article, you’ll learn proven methods for installation, safety, and more.
Understanding Cutting Disc Types
Cutting discs vary by material and purpose, affecting how they mount. Metal cutting discs are thin, abrasive wheels for steel or aluminum, often with a fiberglass reinforcement. Install them label out, hub in, for clean cuts without binding.
Diamond blades suit concrete or tile, with segmented edges for cooling. These usually have clear arrows; align them with the grinder spin to avoid chipping. Flap discs, while more for sanding, mount similarly but prioritize the abrasive flaps facing the work.
Grinding discs are thicker and depressed-center style, where the nut fits into the recess. Knowing your disc type ensures correct orientation from the start. Mismatched types lead to poor performance, as seen in user reports on welding forums.
Why Orientation Matters for Safety and Performance
Proper disc direction reduces risks like shattering, which can send fragments flying at high speeds. Backward installation causes uneven wear, overheating, and kickback, where the tool jerks dangerously.
It also boosts efficiency: the abrasive side contacts the material optimally, speeding cuts and extending disc life. Experts note that reversed discs cut slower and rougher, wasting time on jobs. Safety standards from abrasive manufacturers stress this to prevent accidents in professional settings. What I appreciate is how a simple check saves hassle down the line.
Tools You Need for Proper Installation
Gather essentials before starting. A spanner wrench or the grinder’s included tool locks the spindle for nut removal. Gloves protect hands from sharp edges, and safety glasses shield eyes from debris.
For stubborn nuts, a cross-head screwdriver or adjustable wrench helps. Some grinders need adapters for disc sizes, like 5-inch cutting wheel. Keep a clean cloth handy to wipe the spindle. These basics make the process quick and secure, avoiding improvised fixes that damage parts.
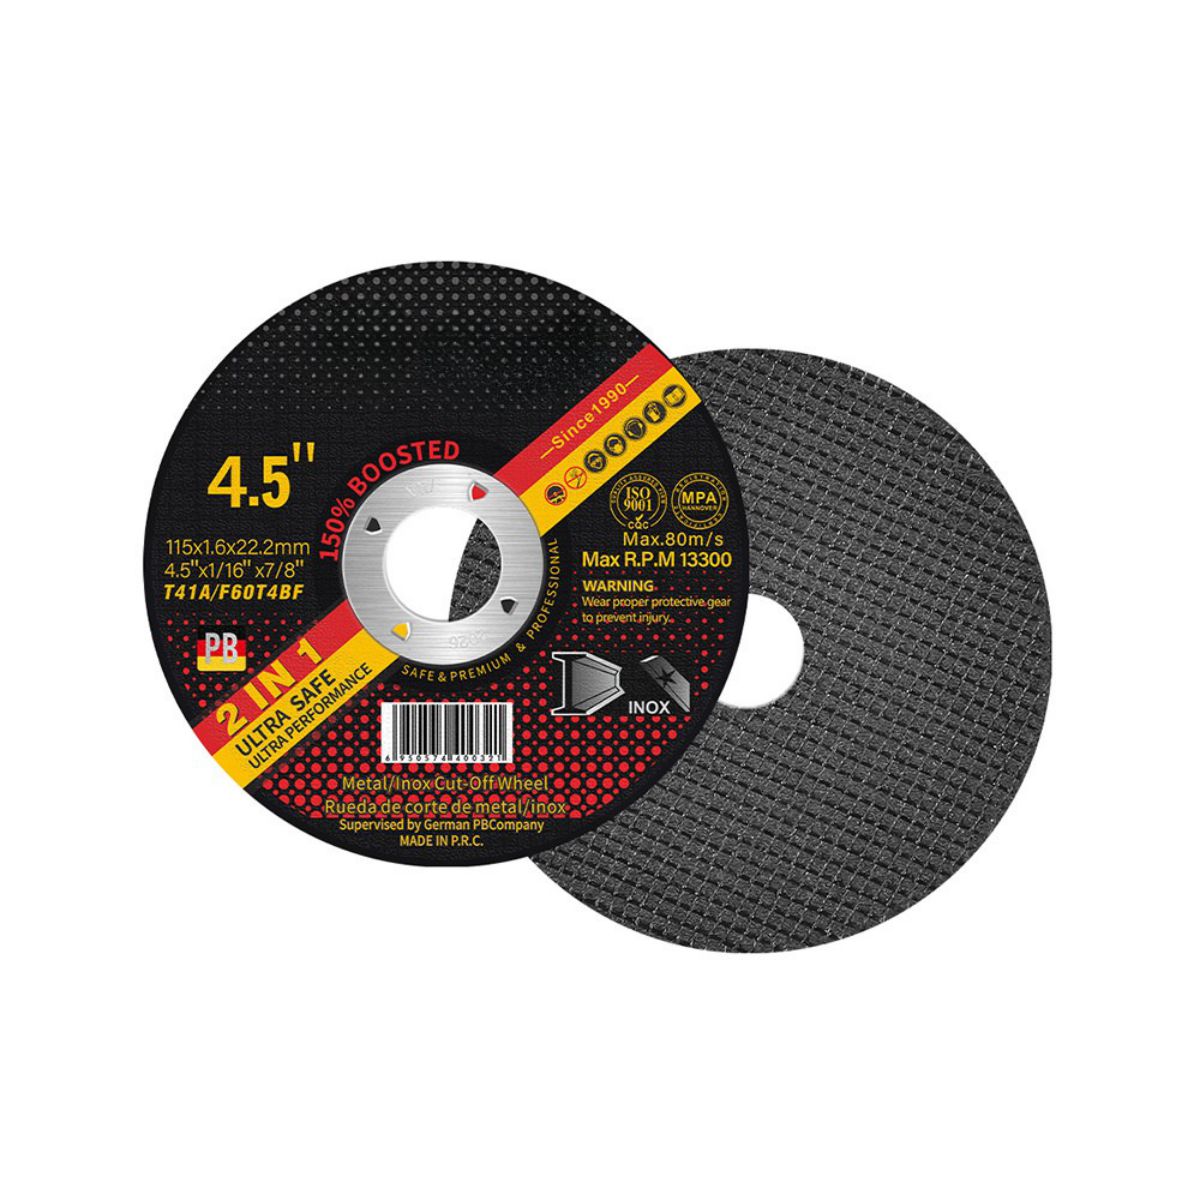
Need to purchase high-quality cutting discs in bulk?
Step-by-Step Guide to Installing a Cutting Disc
Follow these steps for a flawless mount.
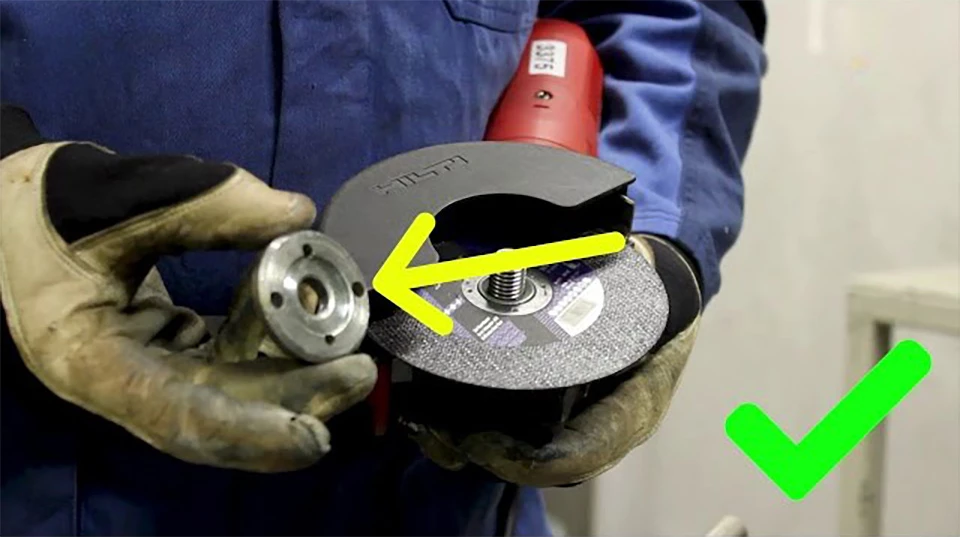
- First, unplug the grinder or remove the battery. Depress the spindle lock and loosen the outer nut counterclockwise—most threads are left-handed to self-tighten during use.
- Inspect the new disc for cracks or warps. Place it on the spindle with the label facing out, hub against the inner flange. Reattach the outer flange or nut, tightening clockwise just enough to secure without cracking the disc.
- Test spin the grinder unloaded for 30 seconds to check for wobbles. If smooth, you’re ready. This method works for most angle grinders, as confirmed by abrasive specialists.
Safety Precautions Before and During Use
Safety starts with inspection: ensure the disc’s RPM rating exceeds the grinder’s max speed. Wear full PPE—goggles, gloves, ear protection, and a dust mask for fine particles.
Position yourself so the disc spins away from your body, reducing fragment risk. Use the guard always; it deflects debris. Start cuts at a 15-30 degree angle to prevent binding. Ignoring these things can lead to hospital visits, so they should be considered as a priority each time.
Common Mistakes and How to Avoid Them
One frequent error is mounting backward, ignoring labels or arrows, which causes kickback. Avoid by double-checking markings before tightening.
Over-tightening the nut stresses the disc, risking cracks—use hand pressure plus a quarter turn. Using damaged discs invites failure; replace at first sign of wear. Neglecting the guard is another big no, as it exposes you to hazards. Simple habits like reading the manual prevent these pitfalls.
Troubleshooting Common Installation Issues
If the disc wobbles, recheck the nut tightness and flange alignment—debris on the spindle often causes it. Overheating during cuts signals a backward disc or wrong material match; flip it or switch types.
Poor cutting performance? Verify arrow direction matches the grinder’s spin. If the nut won’t loosen, apply penetrating oil and retry. These fixes keep your setup reliable, based on real user troubleshooting in tool communities.
Best Practices for Longevity and Performance
To maximize disc life, cut in straight lines with light pressure—let the tool do the work. Cool the disc between long sessions to prevent glazing.
Store discs flat in a dry area to avoid warping. Rotate stock to use older ones first. Match disc grit to the job: coarse for rough cuts, fine for precision. These practices extend usability and cut costs, as experienced users recommend.
Maintenance Tips for Your Grinder and Discs
Regular maintenance keeps everything running smoothly. Clean the grinder’s vents and spindle after use to remove buildup. Lubricate moving parts per the manual.
Inspect discs before storage for edge wear—replace if diameter shrinks below 50% original. Sharpen or dress grinding discs as needed. Annual checks on cords or batteries prevent failures. This routine builds trustworthiness in your tools.
I know that mastering disc installation transforms your grinding tasks from frustrating to efficient. Always consult your grinder’s manual for model-specific details.
Często zadawane pytania
Can you use a smaller disc on a grinder?
Tak, jeśli pasuje do wrzeciona, a osłona odpowiednio się reguluje. Mniejsze tarcze sprawdzają się w ciasnych przestrzeniach, ale upewnij się, że prędkość obrotowa jest zgodna, aby uniknąć przeciążenia. Jest to powszechne przy pracach precyzyjnych, jak zauważono w poradnikach hydraulicznych.
Co jeśli na tarczy nie ma strzałki?
Zastosuj zasadę strony z etykietą na zewnątrz, ze wzmocnioną piastą skierowaną do szlifierki. Przetestuj swobodny obrót; jeśli tarcza się blokuje, odwróć ją. Tarcze budżetowe często nie mają strzałek, ale ta metoda sprawdza się w praktyce.
Jak często należy wymieniać tarczę do cięcia?
Wymień, gdy tarcza jest zużyta do połowy rozmiaru, pęknięta lub po intensywnym użytkowaniu wykazująca oznaki zeszklenia. Kontrola wzrokowa przed każdym zadaniem pozwala wcześnie wykryć problemy, zapobiegając awariom w trakcie cięcia. Eksperci zalecają wymianę co 10–20 godzin pracy, w zależności od materiału.
Jaka jest różnica między tarczą do cięcia a tarczą do szlifowania?
Tarcze do cięcia są cienkie i służą do przecinania materiałów, natomiast tarcze do szlifowania są grubsze i przeznaczone do usuwania powierzchni oraz kształtowania. Tarcze do szlifowania montuj wgłębieniem skierowanym w dół; ich pomylenie grozi nieefektywnością lub pęknięciem.
Czy tarczy do cięcia można używać do drewna?
Tak, ale wybierz tarcze z węglików spiekanych lub specjalistyczne tarcze do drewna, aby uniknąć przypalania lub odrzutu. Standardowe tarcze metalowe zapychają się żywicą. Wyrównaj kierunek zębów ostrzałki z kierunkiem obrotu ostrzałki, aby zapewnić bezpieczne i czyste cięcie.
Czy cięcie bez osłony jest bezpieczne?
Nie, nigdy nie usuwaj osłony—chroni przed rozerwaniem tarczy. Przepisy i specjaliści ds. bezpieczeństwa nalegają na jej stosowanie, nawet przy szybkich pracach. Osłony odchylają odłamki, chroniąc oczy i kończyny w najgorszych scenariuszach.
 English
  العربية
  Español
  Polski
  Русский